
 NavNet MFDs
 Radars
 Fish Finders & Transducers
 GPS & Chart Plotters
 Autopilots
 Navigation
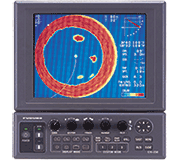 Sonars
 Commercial
Connecting two GP1900C NavNet plotters

Question
I have connected two identical GP1900C NavNet plotter displays with the 6 pin to 6 pin blue interconnect cable (000-154-049), but they do not work properly together. The cable has not been cut and no hub is required because there are only two displays.
Solution
The first problem is that they are identical displays. You must change the factory default settings for the [HOST NAME] and [IP ADDRESS] on one of the units. This holds true for any multiple NavNet display system with two or more displays that are identical . Also, you will need to configure [CHART SOURCE] to share charts and [OUTPUT THROUGH NETWORK] to share GPS position information. Please follow the procedures listed:
1. Decide which display to change the information on (second station typically). Access the "installation menu" by pressing the MENU key for about 5-10 seconds while powering up the unit.
2. Access "network setup" by pressing the MENU button.
3. Select the following softkeys in this order: SYSTEM CONFIGURATION,
INSTALLATION SETUP, NETWORK SETUP.
4. Select IP ADDRESS with rotary knob, select EDIT and change the last three digits of the IP ADDRESS to [.007 or higher]. Caution: Do not change any other numbers of the IP ADDRESS except the last three.
5. Select HOST NAME with rotary knob, select EDIT and change HOST NAME to PLOTTER1.
6. Select CHART SOURCE with rotary knob, select EDIT and select PLOTTER to allow sharing of any charts. Note: Perform this step on the other display as well, only select PLOTTER1 in the chart source field.
7. On the display that has the GPS source directly connected, access the port setup by pressing the MENU key.
8. Select the following softkeys in this order: SYSTEM CONFIGURATION, SYSTEM SETUP, PORT SETUP, OUTPUT THROUGH NETWORK.
9. In OUTPUT THROUGH NETWORK select and turn on the GGA, VTG, ZDA sentences by using the rotary knob and ON/OFF soft key.